

How To Add Blank Layer In Photoshop

Creating A New Background Layer Activity In Photoshop
Learn how to create a new Background layer for a Photoshop document from scratch, and how to save your steps as a time-saving activeness! For Photoshop CS6, CC and before versions of Photoshop.
Previously, we learned all nigh Photoshop'south Background layer and why it'due south unlike from normal layers. Since the Background layer serves as the background for our certificate, in that location are certain things that Photoshop won't permit us to do with it. The most important of those things are that we can't move the contents of the Background layer, we can't move other layers beneath the Background layer, and since the Background layer does not support transparency, we can't delete any pixels from the Background layer.
If you're doing prototype retouching work (adjusting the exposure and dissimilarity, correcting colors, removing peel blemishes, and so on), the Background layer's limitations probably won't be an issue. But if you're creating photo furnishings, compositing multiple images together, or doing anything where you lot demand more control over the initial photo y'all opened in your document, and so the Background layer can speedily become a problem.
Let'southward get started!
Let'southward look at a simple instance to show you lot what I mean. Here's an image I've opened in Photoshop. I downloaded this one from Adobe Stock only you tin hands follow forth with whatever image of your own:
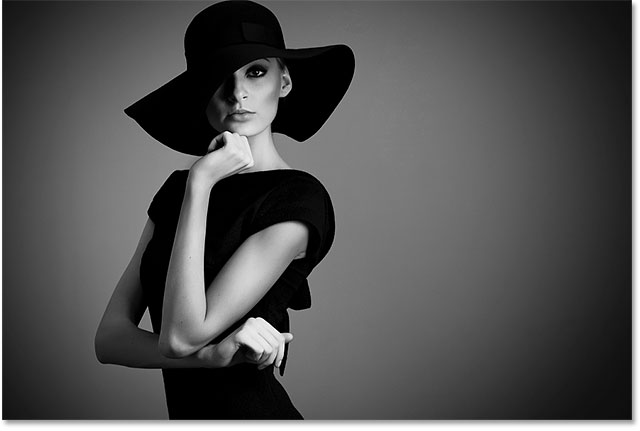
The original image.
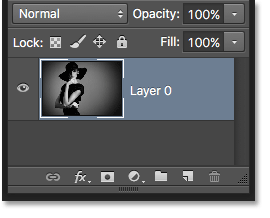
Whenever we open an prototype, Photoshop automatically places it on the Background layer, every bit we run across hither in my Layers panel:
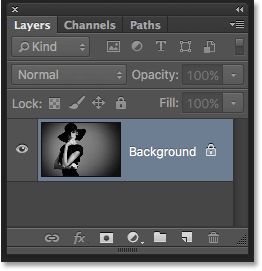
The Layers panel showing the prototype on the Background layer.
Let's say I want this prototype to appear in front of a white groundwork, with the white groundwork acting as a border effectually the photo. Sounds piece of cake plenty, right? And nonetheless, there's a problem. Since my photograph currently is the groundwork for the document, how do I place a different groundwork under information technology? The respond is, I can't. Photoshop won't allow us to identify any other layers below the Background layer.
And let's say I also desire to add a basic drib shadow beneath the paradigm. Again, it sounds like shooting fish in a barrel, only we're faced with the same problem. The photo would need something else below information technology in society for the shadow to exist visible, but Photoshop won't permit united states place anything beneath the Background layer.
In fact, if nosotros look at the Layer Styles icon (the "fx" icon) at the bottom of Layers panel, which is what we would unremarkably click on to add a drop shadow (also as any other layer effects), we see that the icon is grayed out. Photoshop won't let us add layer effects to the Background layer:
The Layer Styles icon is currently unavailable.
And then what's the solution? Well, the solution really has ii parts to it. First, we need to convert our initial Background layer into a normal layer. That way, we'll have consummate control over the paradigm and we'll exist able to practice whatever we need to practise with it. Second, we need to create a new Background layer from scratch and place information technology beneath the prototype.
Fortunately, the steps for doing both of these things are very simple. Merely even simple things take time. And so, since this is something nosotros'll need to do a lot in Photoshop, rather than performing the steps manually every fourth dimension, we'll go through them once here and save them all as an activity.
What'southward an action? In Photoshop, an action is a pre-recorded series of steps. Yous simply create a new activity and then record your steps. After that, any fourth dimension you lot need to perform the aforementioned steps over again, rather than doing them yourself, you but play the activity and let Photoshop do the work for you lot! In our example here, once nosotros've recorded the steps for creating a new Background layer, then in the future, we can permit Photoshop create 1 for united states of america just by playing the action. Let's see how it works.
How To Create A Background Layer Action
Pace 1: Check Your Background Color
When we create a new Groundwork layer, Photoshop volition fill the layer with our electric current Groundwork color. So before we become any farther, and to avoid unexpected results, nosotros should check to make sure that our Background color is prepare to the color we demand.
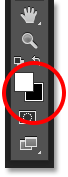
We tin run into our current Foreground and Background colors in the color swatches near the lesser of the Tools panel. By default, Photoshop sets the Foreground color to blackness and the Background color to white. Since white is the most common color for the background, these default colors work great.
If your Foreground and Background colors are set to something other than the defaults, printing the alphabetic character D on your keyboard to quickly reset them (recall "D" for "Default colors"):
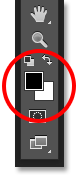
The Foreground (upper left) and Background (lower right) color swatches.
If yous'd rather fill up your Groundwork layer with blackness instead of white, first press the letter of the alphabet D on your keyboard to reset the Foreground and Background colors to their defaults (if needed). And then press the letter of the alphabet Ten on your keyboard to swap them, which sets your Background color to black:
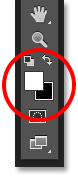
Printing Ten to bandy the Foreground and Background colors.
You tin press X again if you lot change your mind to swap them back to the default settings, which is what I'm going to do considering I want my Background layer to exist filled with white. Either manner, just make certain yous check your Background color before creating the Background layer.
Step 2: Open The Actions Console
To record our action, we need to use Photoshop's Deportment console. Unlike the Layers panel, the Actions panel is not one of the panels that Photoshop opens for us by default, so nosotros'll need to open it ourselves.
Become upwards to the Window menu in the Carte Bar along the top of the screen. Here, you'll find a list of every panel that's available to u.s. in Photoshop. Select the Actions panel from the list. If y'all meet a checkmark next to the console'south name, it means the panel is already open up somewhere on your screen. If you don't see the checkmark, go alee and select it:
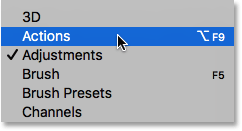
Going to Window > Actions.
This opens the Actions console. Photoshop includes a collection of default deportment which are found in the cleverly-named Default Actions fix. You can twirl the Default Actions set open to view the actions inside of it by clicking the triangle icon to the left of the little folder icon. Clicking the triangle again volition close the fix:
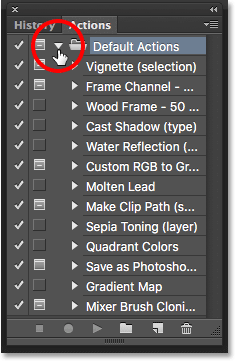
Viewing Photoshop's default actions.
Footstep 3: Create A New Action Set
We're going to create our own action, and rather than calculation information technology in with Photoshop's default deportment, allow'south create a new action set. An action set is like a folder that holds the deportment inside of information technology. Creating unlike action sets lets usa continue related actions together.
To create a new set, click the New Ready icon (the folder icon) at the bottom of the Actions panel:

Clicking the New Ready icon.
This opens the New Set dialog box where we give the set a proper noun. You lot can name it anything yous similar. I'll name mine "My Actions". Click OK when you're done to close out of the dialog box:
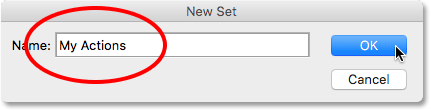
Naming the new action set.
The new action fix appears below the Default Actions gear up in the Actions panel:
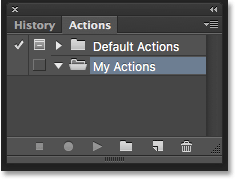
The new set has been added.
Footstep 4: Create A New Action
At present that we have our set up, permit'southward create a new action. Click the New Action icon directly to the correct of the New Set icon:
Clicking the New Action icon.
This opens the New Action dialog box. Give your activeness a descriptive name. I'll name mine "New Background Layer". Then, make sure the Ready pick (brusk for Action Gear up) directly below it is showing the action set you but created, which in my example is named "My Actions". We want to make sure the activeness is going to exist placed into the correct set:
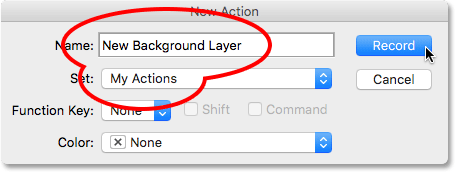
The New Activity dialog box.
Stride five: Click "Record"
When you're ready, click the Record button to close out of the dialog box and begin recording your action:
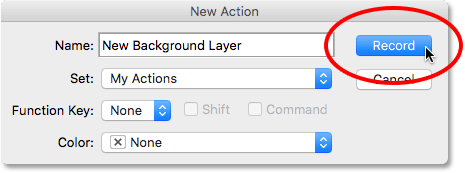
Clicking the Tape button.
If nosotros wait again in the Actions panel, we see that the red Record icon has been activated, letting us know that we're now in Record way:
Photoshop is at present in Tape mode.
From this moment on, Photoshop is going to record all of our steps so we can play them dorsum later. But don't worry about how long it takes you lot to consummate the steps. Recording an action in Photoshop is non like recording a flick. In other words, we're not recording in real time. Photoshop records only the steps themselves, non the fourth dimension it takes to complete them. And then sit back, relax, take all the fourth dimension y'all need, and permit's tape our action!
Stride 6: Catechumen The Background Layer Into A Normal Layer
The offset matter we need to do is convert our current Background layer into a normal layer. To do that, get up to the Layer menu at the top of the screen, cull New, and so choose Layer from Background:
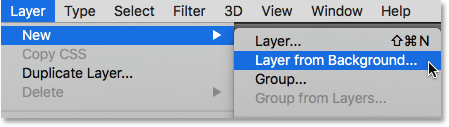
Going to Layer > New > Layer from Background.
This opens the New Layer dialog box. Leave the name set to "Layer 0" and click OK to close out of the dialog box:
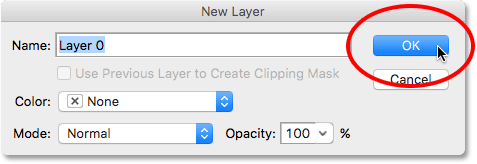
The New Layer dialog box.
If we look in the Layers panel, we see that our Groundwork layer is no longer a Groundwork layer. It'southward now a normal layer named "Layer 0". So far, and so expert:
The Background layer has been converted to a normal layer.
Step 7: Add together A New Layer
Next, we'll add a new layer that will go our new Background layer. Click the New Layer icon at the bottom of the Layers panel:
Clicking the New Layer icon.
Photoshop adds a new blank layer named "Layer 1" above the prototype:
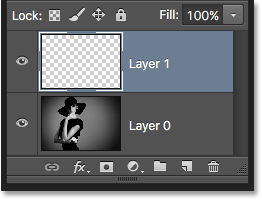
The Layers panel showing the new blank layer.
Step 8: Catechumen The Layer Into A Groundwork Layer
Let'due south convert the new layer into a Groundwork layer. Go support to the Layer card, choose New, and and then choose Background from Layer:
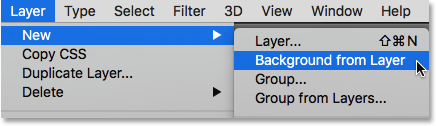
Going to Layer > New > Groundwork from Layer.
A couple of things happen. First, as shortly as we catechumen the layer into a Background layer, Photoshop automatically moves the layer from in a higher place the image to below the image in the Layers panel. That's because 1 of the main rules of Groundwork layers is that they must e'er be the bottom layer in the document. No other layers can appear below a Background layer.
2nd, if we look at the Background layer's preview thumbnail to the left of the layer'south name, we run into that Photoshop filled the Background layer with white. As nosotros learned earlier, that'south because Photoshop automatically fills the Background layer with our current Background color. In my case, it was white:
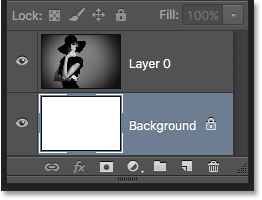
The Layers panel showing the new Background layer.
Stride 9: Stop Recording
At this bespeak, we've done everything we demand to practice. We've converted the original Groundwork layer into a normal layer, and we've created a brand new Background layer from scratch. Since there are no more than steps to consummate, let'due south stop recording our activity by clicking the Stop icon (the square) at the lesser of the Deportment console:
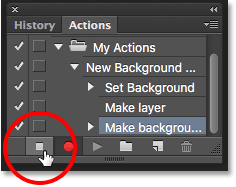
Clicking the Stop icon.
The steps for creating a new Background layer are at present saved as an action! We can see the steps listed under the action's name. We don't need to run across them, though, and then I'thou going to toggle the action closed past clicking the triangle icon to the left of its name:
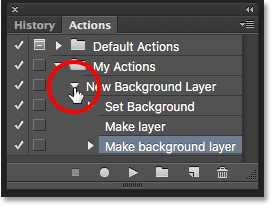
Closing the activeness by clicking the triangle.
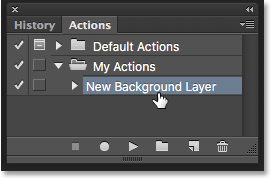
And now nosotros come across merely the name of the action ("New Background Layer") listed nether the "My Actions" set:

The Actions console after closing the action.
Step 10: Revert The Image
Lets test our new activeness to make sure it works. To do that, nosotros'll revert the epitome dorsum to its original land by going upward to the File menu at the top of the screen and choosing Revert:
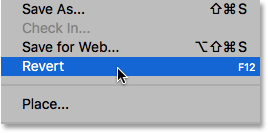
Going to File > Revert.
The Revert command in Photoshop restores the image either to its previously-saved version or, as in our case here, to its original, newly-opened version. If we look in the Layers panel, we meet that we're back to having our prototype as the Background layer of the document:
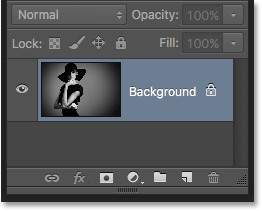
The default Background layer has returned.
Step 11: Play The Action
Before we exam the action, I'm going to swap my Foreground and Background colors past pressing the letter of the alphabet X on my keyboard so that my Background colour is now black instead of white:
Setting my Background color to black.
Let's play the activeness and see what happens. To play information technology, click on its proper noun in the Deportment panel to select information technology:
Selecting the "New Groundwork Layer" action.
Then, click the Play icon (the triangle) to play information technology:
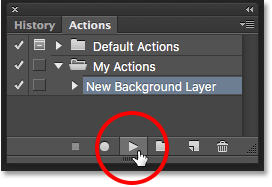
Clicking the Play icon.
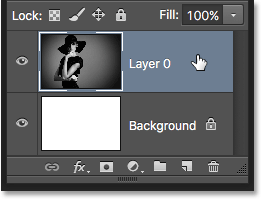
No matter how long it took united states to tape the steps, Photoshop plays them dorsum instantly. And if we look again in the Layers panel, we see that everything is already washed! The original Groundwork layer was converted to a normal layer named "Layer 0" and a new Groundwork layer was created and placed beneath it!
Notice that the preview thumbnail for my new Background layer is filled with black this fourth dimension instead of white. That'due south considering I fix my Background color to black before playing the activity:
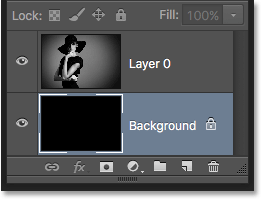
The Layers panel after playing the action with the Background color gear up to black.
Changing The Color Of The Background Layer
If y'all forgot to bank check your Background color before playing the action and ended up with the wrong color for the Background layer, no worries. You can hands change its colour subsequently. First, make sure the Background layer is selected in the Layers panel. And so, go upward to the Edit bill of fare at the top of the screen and choose Fill:

Going to Edit > Fill.
I need my Background layer to exist white, so I'll set the Use option at the top of the Make full dialog box to White:
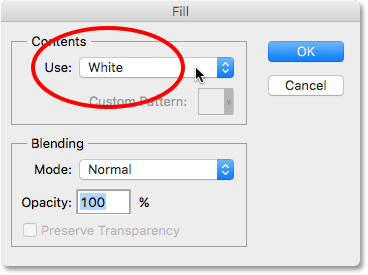
Selecting a new color for the Background layer.
Click OK to shut out of the dialog box, at which point Photoshop fills the Groundwork layer with your chosen colour. If we look once again at the preview thumbnail for my Background layer, we see that it'due south at present filled with white:

The Background layer color has been inverse from black to white.
Of course, we oasis't actually seen the Groundwork layer yet in the certificate considering the photo is blocking it from view, and so I'll apace resize my photograph by beginning selecting its layer (Layer 0) in the Layers console:
Selecting the photo's layer.
So I'll go up to the Edit menu at the top of the screen and choose Free Transform:
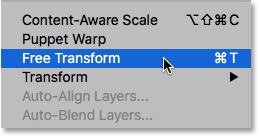
Going to Edit > Free Transform.
This places the Free Transform box and handles around the image. I'll printing and concord Shift+Alt (Win) / Shift+Option (Mac) on my keyboard as I click on the handle in the tiptop left corner of the image and elevate information technology inward to brand the photo a fleck smaller. Holding the Shift central as I drag locks the aspect ratio of the image as I'm resizing information technology, while the Alt (Win) / Option (Mac) key resizes the epitome from its center rather than from the corner.
With the image now smaller, we tin can see the white background appearing as a border around it:
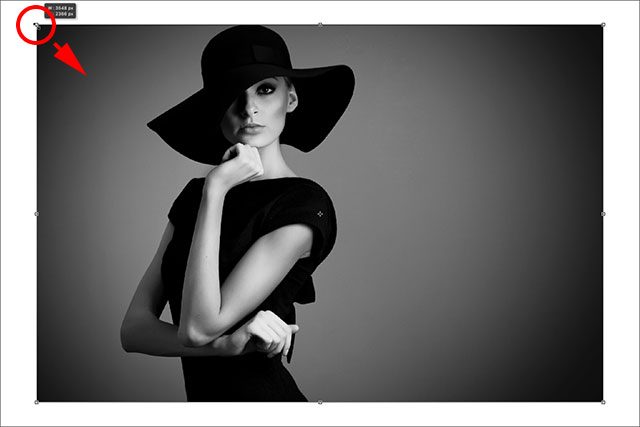
Resizing the image with Free Transform.
I'll press Enter (Win) / Render (Mac) on my keyboard to accept the transformation and close out of the Free Transform command. So, I'll add a driblet shadow to the image by clicking the Layer Styles icon at the bottom of the Layers panel. This is the aforementioned icon that was grayed out earlier when the image was on the Background layer:
Clicking the Layer Styles icon.
I'll select Drop Shadow from the listing of layer styles that appears:
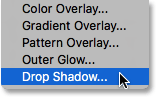
Selecting a Driblet Shadow layer style.
This opens Photoshop's Layer Style dialog box set to the Drop Shadow options in the middle column. I'll gear up the Angle of the shadow to 135° so that the light source is coming from the upper left. So, since I'm working on a fairly big image here, I'll set the Distance of the shadow to xl pixels, and I'll set the Size value (which controls the softness of the shadow edges) to 40 pixels as well. Finally, I'll lower the Opacity of the shadow downwardly to 50%:
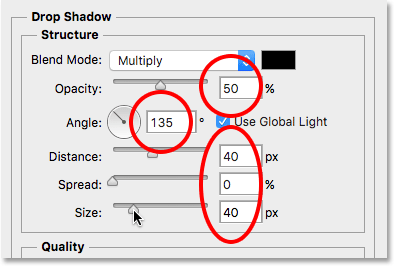
The Driblet Shadow options in the Layer Fashion dialog box.
I'll click OK to accept my settings and close out of the dialog box, and hither's my terminal result with the drib shadow applied:
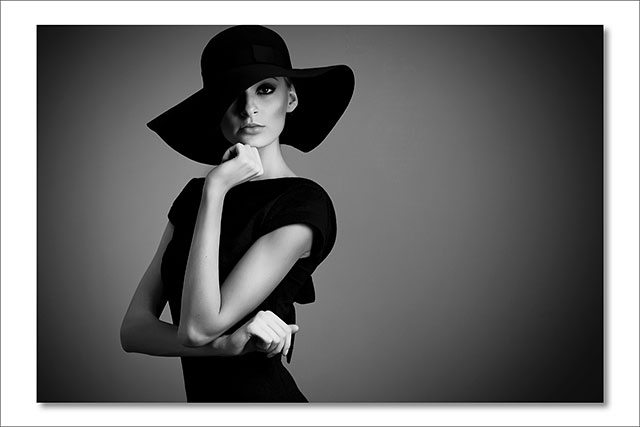
The final result later on applying the drop shadow.
That concluding office (resizing the image and adding a drop shadow) was a bit beyond the scope of this tutorial (which is why I went through it quickly) but information technology served as an example of something we could do with the image that would not accept been possible if the paradigm itself had remained the Background layer for the certificate. Converting the image into a normal layer and then adding our ain, separate Background layer below information technology freed us from the Groundwork layer'southward limitations, making it easy to achieve our goal.
And, since we recorded those steps as an action, the next time we demand to supplant the default Background layer with a new one, we tin only play the activeness and let Photoshop do all the work! And in that location we accept it!
Where to go next...
And at that place nosotros have it! In the next lesson, we'll learn all about i of the nigh fourth dimension-saving features in Photoshop, how to open multiple images as layers!
Y'all tin can jump to any of the other lessons in this Photoshop Layers series. Or visit our Photoshop Basics section for more topics!
Other Stuff
© 2022 Photoshop Essentials.com.
For inspiration, not duplication.
Site design by Steve Patterson.
Photoshop is a trademark of Adobe Systems Inc.

How To Add Blank Layer In Photoshop,
Source: https://www.photoshopessentials.com/basics/creating-new-background-layer-action-photoshop/
Posted by: hickscolithat.blogspot.com
0 Response to "How To Add Blank Layer In Photoshop"
Post a Comment